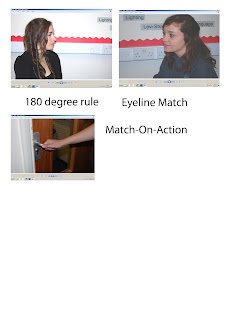
 When doing the preliminary filming task I learnt about continuity editing -what it is and why it is used. It is a process of editing to make the edits as invisible as possible. Also when filming we had to consider the key rules of continuity editing-180 degree rule is when each character must stay on one part of the screen and must never appear in the same frame, match-on-action is two pieces of footage of the same event are filmed together in different ways to make them seem continuous, 30 degree rule is used to avoid jump cuts and the eye-line match is when footage is matched to the characters eye line.
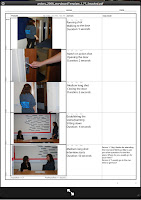
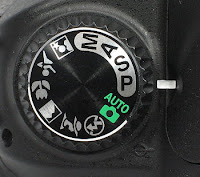
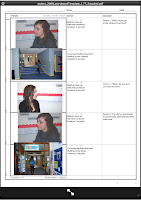 When creating the story board to illustrate the sequence of the film with different shots being used, I used a digital SLR camera to take photo's of the shots that I will be using. Using this camera was easy as I set it on 'portrait mode' to capture the main aspect of the image- the character. I learnt when using the digital SLR camera that I was fairly confident with using this technology as I have used it before and the functions I used for this task I had also used before
 After using the digital SLR I could now create the story board using 'Adobe Photo Shop CS5'. I print screened the photos onto the program and added text to demonstrate what the shots were and what we were doing. After doing the story board we could start filming-I used a digital video camera. When using this digital video camera I found that I didn't really know how to use it at first, but once I got the hang of it after a few shots it was fairly easy to work. The functions we used on this camera were zoom and rewind.
I thought that when we filming we were fairly organised as we managed to get the filming process and beginning of the editing process in one lesson. Although I think we could of been a little bit more organised as we missed a few continuity editing shots as in one scene we accidently produced a jump cut - which we had to redo along with the match-on-action shot.
.jpeg) After finishing the filming process we uploaded the footage from the video camera using a 'firewire'. The firewire imports the footage from the camera onto the computer in a programme called 'Adobe On Location CS5' which we then record which clips we needed for our sequence. After we used the programme 'Adobe Premiere Pro' which allowed me to edit clips easily. I found this programme to be quite confusing when I first did it, but after a few attempts from having to import the same clips again due to the computer wiping them I had got used to all the tools and techniques. The tools we used were 'razor' which erased part of a clip more easily, we also 'unlinked' clips so the sound wasn't running through that clip or to import a different sound from a different clip eg talking. The difficulties with this programme and 'On Location' were we kept losing our saved video clips to import to 'Adobe Premiere pro' as we saved them in the wrong drive ( G drive) which kept wiping our saved clips so we had to keep importing the video clips onto the computer and save it to the D drive.
After finishing the filming process we uploaded the footage from the video camera using a 'firewire'. The firewire imports the footage from the camera onto the computer in a programme called 'Adobe On Location CS5' which we then record which clips we needed for our sequence. After we used the programme 'Adobe Premiere Pro' which allowed me to edit clips easily. I found this programme to be quite confusing when I first did it, but after a few attempts from having to import the same clips again due to the computer wiping them I had got used to all the tools and techniques. The tools we used were 'razor' which erased part of a clip more easily, we also 'unlinked' clips so the sound wasn't running through that clip or to import a different sound from a different clip eg talking. The difficulties with this programme and 'On Location' were we kept losing our saved video clips to import to 'Adobe Premiere pro' as we saved them in the wrong drive ( G drive) which kept wiping our saved clips so we had to keep importing the video clips onto the computer and save it to the D drive.We each imported our video onto our own blogs using 'Youtube'. We did this by creating a Youtube account and uploaded our video onto there- which wasn't a problem. To get the video onto our blog all we had to do was copy and paste the Youtube URL onto our post and it uploaded. Using Blogger made it more easier to set out my work neatly and helped me organise it better. Overall I found this Preliminary Task quite frustrating at points when we lost our clips but I did enjoy the filming and editing part once I got used to it.
Proficient evaluation of the organisation, your learning and the use of technology. Some proficient use of images to illustrate your learning though you could have done with more of the actual editing process. You need to check your text on the blog is easily legible.
ReplyDelete